Details
- Hook no 3.5mm
- Cotton 150 gr (S), 200 gr (M), 250 gr (L)
- The quantity of stitches of this patterns is based on the size M, but stay with me because I'll teach you how to calculate the stitches to adapt this top to any size you want.
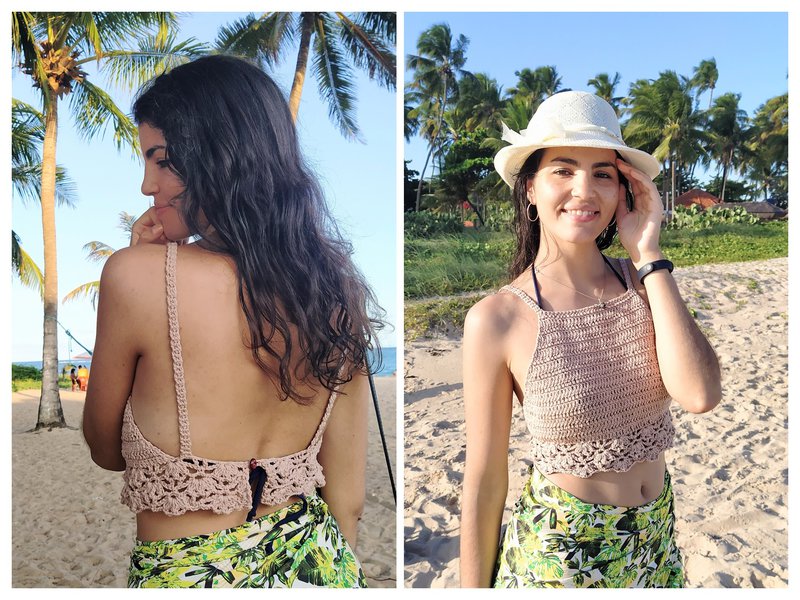
- Measurements for size M: Wide (dos dedos arriba de la cintura) 68 cm, Height 25 cm
Stitches we are gonna use
- Double crochet (dc)
- Single crochet (sc)
- Chain (c)
- Slip stitch (sl st)
Sample
Before starting to weave, I always recommend making a sample so we can be sure that the thread we choose goes well with the hook we are going to use, (in this case, since it is a garment, it is good that we take care that it does not get “stiff” ), to see if the fabric stretches or shrinks and to take this into account when we do the calculations, and it also helps us to see how many stitches we can fit into, for example, a 10cm x 10cm sample and thus calculate how many stitches we are going to need for the measure we want to make the garment.
It is always a pain to make the sample but it is really worth it. Generally it is good to make a 10cm x 10cm sample, it gives us a clearer picture of how the fabric behaves to take into account everything mentioned above.
Given that in this design we have two different “drawings”, one is the lace and the other is just double crochet, you can make two samples and see how it turns out, but I think that making a sample of just dc is enough.
The sample I made is 10cm x 10cm and I got 17 dc wide and 9 rows high.
Note
Keep in mind that at the waist it has to fit the body, so when you make the base chain (following the instructions on the next page) try it around your waist stretching it a little as a control to make sure you did well the calculations, this is because when we knit, the fabric stretches. For example, I am 70 cm (calculating two fingers above the waist) and I made the lace 68 cm.
Let's start!
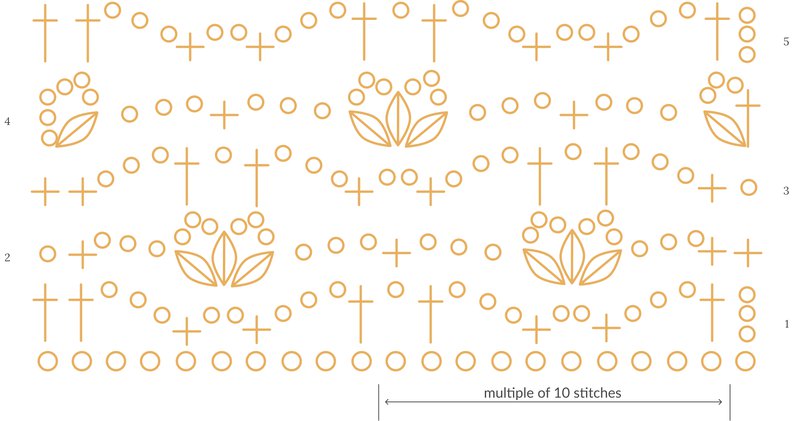
We start weaving from the lace with 121 chains (multiple of 10 and at the end we add 1) plus 3 chains to go up that will take the place of the first dc. We knit following the diagram below until we complete 6 rows. We cut and hide threads (cut and fasten).
Now we start the rest of the body from the base chains that we made to make the lace stitch.
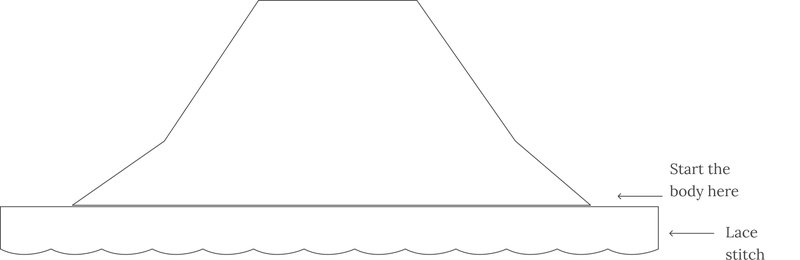
We take the lace on the right side of the fabric and we begin to weave from the base chain no. 16 (counting from right to left) as follows:
- 2 dec, 83 dc, 2 dec, turn the piece
- 1 dec, 83 dc, 1 dec, turn the piece
- 2 dec, 76 dc, 2 dec, turn the piece
- 1 dec, 76 dc., 1 dec ., turn the piece
- 2 dec., 72 dc., 2 dec., turn the piece
- We continue in the same way until we complete 20 rows.
Here I leave you a video of how to make the decreases
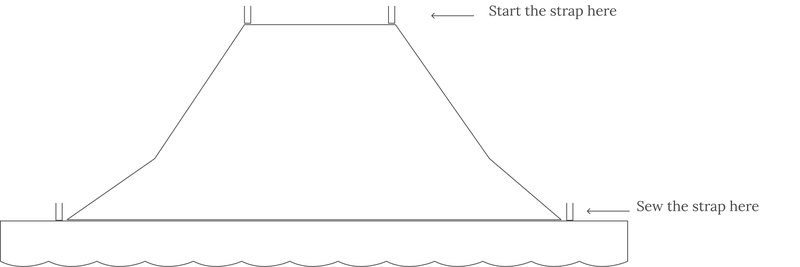
Now we knit the straps:
Without cutting thread, we make a chain, turn the piece and knit 2sc. We raise a chain again and we make 2mp. We continue in this way until we complete 64 rows. We cut and sew to the base of the top, next to the beginning of the body. Repeat for the other strap.
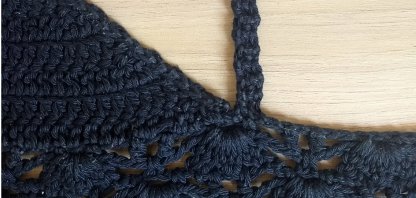
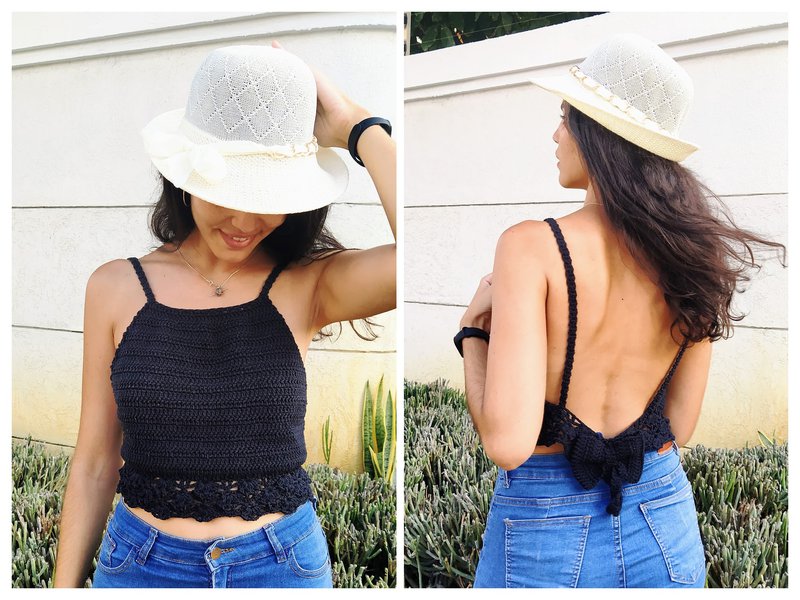
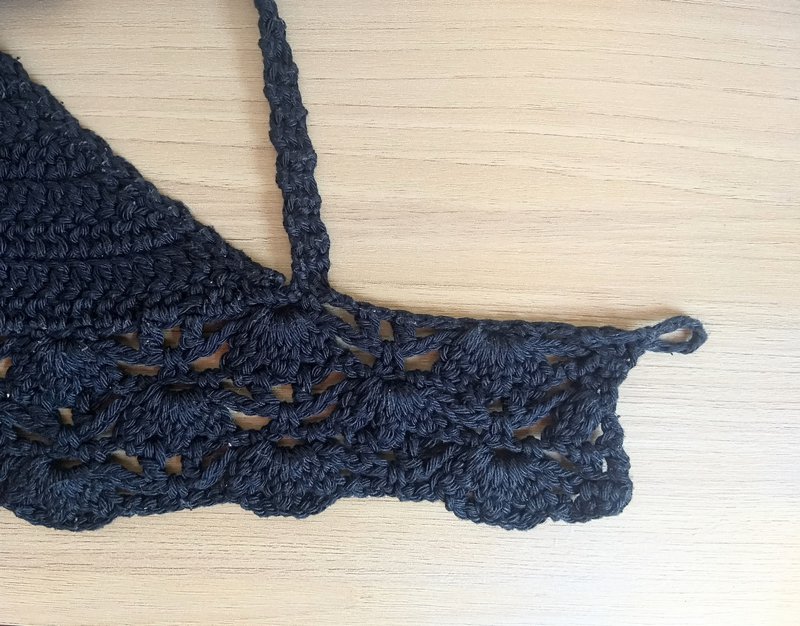
To close the top on the back we are going to sew a button on one side and on the other side we will knit a loop as shown in the photo below. This loop is woven by clicking on chain no. 1 of the base chain of the lace, weave the necessary number of chains according to the selected button (try it to check that it is neither small nor large) and then we weave one sl st on the same base point.
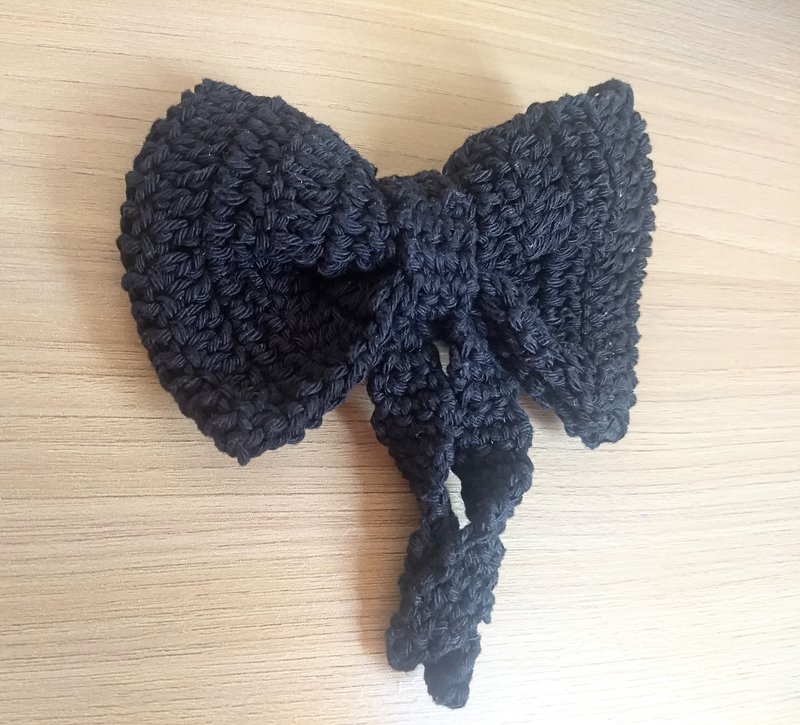
To finish we make the bow following the next 4 steps.
- We weave a rectangle 16 dc wide by 20 rows long and join with a seam to make it tubular.
- We knit a strip of 3 sc. wide by 14 rows long.
- Sew the strip around the rectangle to form the bow.
- Finally, from the strip that adjusts the bow we are going to weave the strips that hang as follows. We take a point from the strip that adjusts the bow and weave 3sc in the same stitch. We turn the piece, raise a chain and knit another 3 sc. We continue in this way until we reach 14 rows. We turn the piece and in row no. 15 make 2 dec. We cut and finish. We repeat the same steps for the other strip. Finally we sew the bow on the same side as the button.
Here the video to the online Course in YouTube!
Thank you knitter for making this design with me!
I hope you enjoyed knitting it a lot!
If you share it on your instagram you can do it with the #topfloripabe and @bemoon.designs so I can see it that excites me a lot ♡